Accessing User Administration
To access the User Administration page, click on the User Administration button under the Users section of the left hand navigation bar.
User Administration Overview
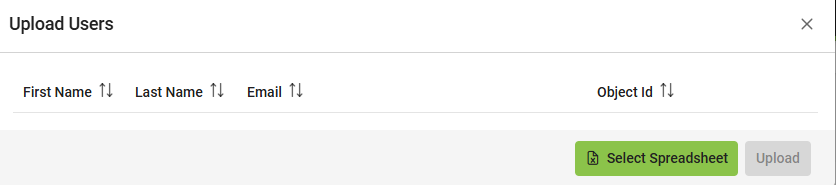
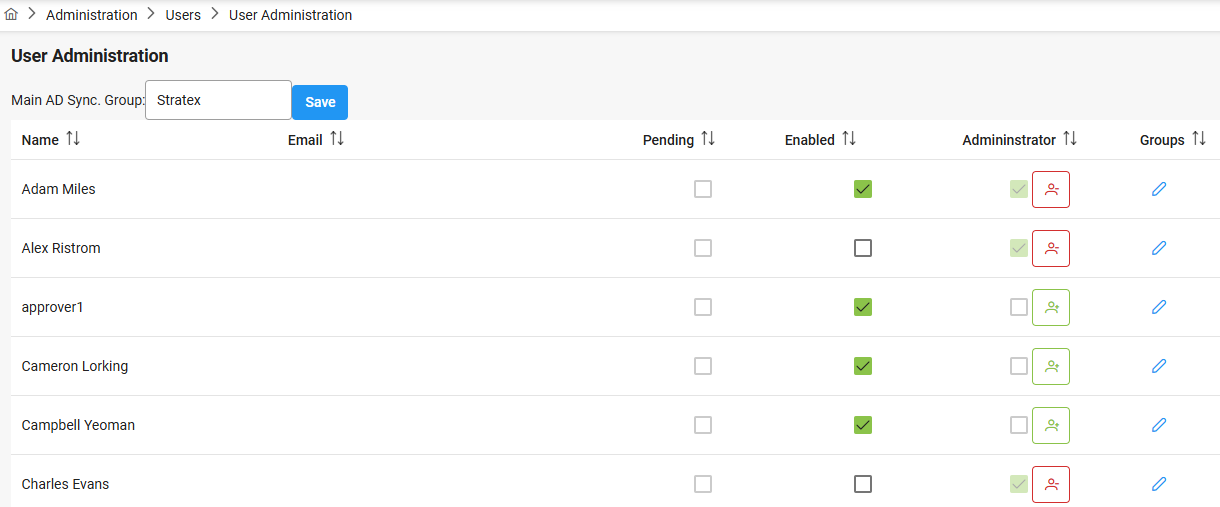
The user administration page provides a full list of users with their name and email address. This can be manually inputted or can be uploaded (as below) through a spreadsheet upload.
It also provides the following features:
An AD Group can be assigned to expedite user administration setup.
Enable / Disable a user.
Set administrator permissions for users.
Control members of user authorization groups.
AD Group Assignment:
The ‘Main AD Sync. Group’ option can be used to synch users into Stratex in-advance so that they can be assigned to roles for workflow. This functionality is for administrative convenience and will perform a one way synch from AD to Stratex to pre-setup users.
Alias
Users can have an alias name shown in brackets, e.g., Allan Fripps (Allan Hamburg).
Disabling a User
When a User logs into Stratex using their single sign on authentication they are automatically Enabled. If at a later stage they leave, the Administrator will de-select them in the Enabled column as can be seen in the screenshot above. In doing so, they will no longer be able to be assigned to any Role in the Org Structure or Agent Determination under Workflow. If any initiative has them as a participant in the DoA workflow the users name will still be seen for reporting, however the disabled users name will be greyed out and may have (inactive) next to their name.
Setting Administrator Permissions
Users with administrator permissions are shown with a green tick and red button.
Users with no administrator permissions are shown with a no tick and green button.
Clicking the button enables/disables administrator permissions for the user.
Adding Users to Authorization Groups
Adding a user to an authorization group means that user can access initiatives which have the authorization traits defined in the group.
To edit a user's authorization groups, click the edit icon under the Groups column for a particular user.
The modal which appears allows for maintenance of a user's authorization groups.
To add a new Authorization Group for the User, click on the Add button. Then select the Authorization group you wish to add them too from the drop-down menu. (Configured under Authorization Groups) A user can be assigned to more than one Authorization Group.
To remove the User from an Authorization Group, click the Delete icon.
Once done, click on the green Save button to finalize the authorizations.
To activate newly assigned authorizations, a user will need to click on the round green button with their initials top right of screen. This will bring up a drop-down menu and they must select 'Refresh my user Authorizations”.
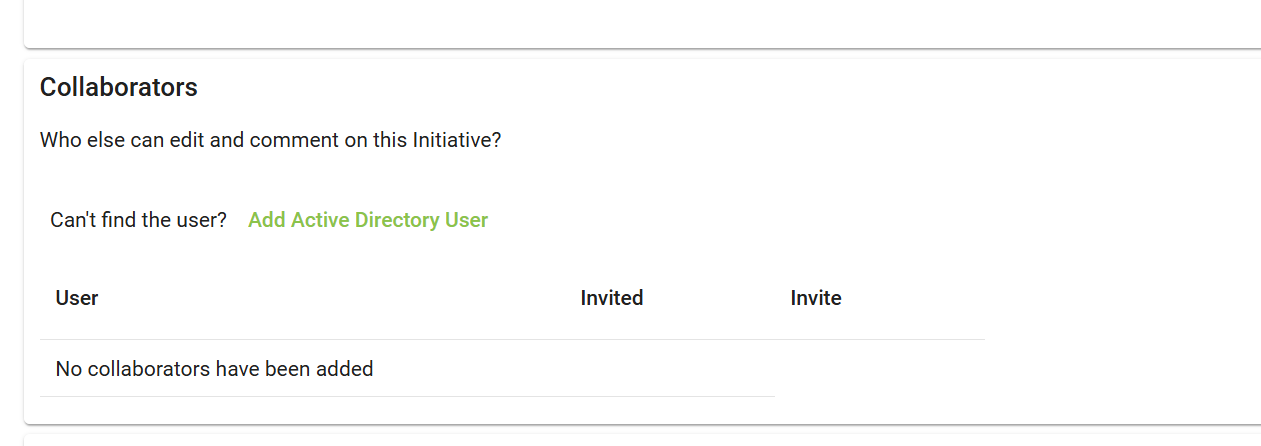
On-Demand User Enrolment
Sometimes it is necessary to add new users as required for endorsement or collaboration.
On request, Active Directory integration can be enabled to automatically provision users as needed.
If activated, end users will see an option to “Add Active Directory User”:
On selection, a lookup dialog is presented:
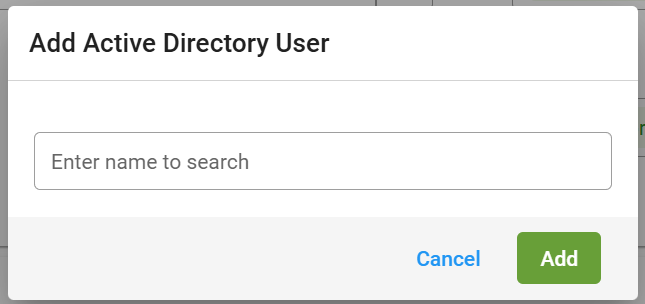
If the user is found in the “Active Directory”, the user will be automatically added to the User Pool, and be available for inclusion in workflow processes.