Organizational Structure Overview
The Organizational Structure reflects the investment management responsibility hierarchy. Each node of the organizational structure is referred to as an Area. Key roles are assigned to each area of this responsibility hierarchy, and each area is assigned to a Company Code, and optionally to a Cost Centre or Plant. All initiatives are linked to a benefitting and sponsoring area (which may be the same). Ultimately, sponsoring areas are responsible for initiative prioritization and selection within their area, and for requesting and managing budget funding accordingly. As each area in the organizational structure corresponds to a responsibility area, the structure is often similar to an organization’s cost centers, business units or departments. The Organization Structure in Stratex Online is, however, free from any legacy definitions or constraints in the accounting system and should be defined to closely align to current capital budget management responsibilities.
Each Area is assigned a Company, Plant, Cost Centre, and External ID. Roles, Strategy and Target are all assigned to by Area. When no longer required, Areas can be disabled for future use.
Accessing the Organizational Structure
To access the Organization Structure page, click on the Organizational Structure button under the Configuration section of the left-hand navigation bar.
Editing the Organizational Structure
The Organizational Structure page consists of the following tabs:
Structure
Roles
Segments
Strategy
Organizational Area Structure
The key attributes of an Organizational Area are:
Area Name - Used to identify the org area. The org area name is what appears for selection when a user needs to select a benefiting department and/or sponsoring department when filling in an initiative and so should make look-up easy. Including a familiar Area code as a prefix will assist in this as the users can type it in when searching for an area.
Company - From the drop-down you can select which Company the Area is associated with. Companies are configured under Configuration Data and will determine the local currency of the initiative. A Company code is mandatory for all nodes in the Organizational Structure.
Plant - From the drop-down you can select which Plant the Area is associated with. Plants are configured under the More tab in Companies under Configuration Data.
Cost Center - From the drop-down you can select which Cost Center the Area is associated with. Cost Centers are configured under the More tab in Companies under Configuration Data.
External Id - Used for integrating to investment program positions in external systems. There is no restriction on what can be entered here.
Inactive - If Inactive is selected then the Area will remain in the Org Structure but when a User is completing an Initiative, it will not appear as an option for selection.
To Rearrange Rows - Put the org area page into rearrange mode to move org area nodes by clicking on them and dragging.
To Expand/Collapse Org area Node - Expand/collapse all child org areas by clicking on the right / downward facing
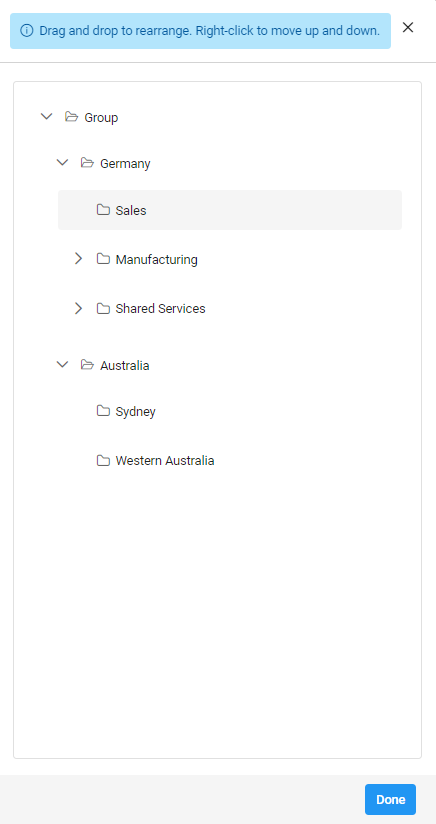
Rearrange Organizational Structure
Clicking Rearrange button, will load the following modal to allow drag and drop for rearranging the hierarchy of the org areas. Once complete click Done and then the Green Save button bottom right. This will have re-arranged the org structure as per how you moved the org Areas in the drop-down.
Role Assignment to Organizational Areas
Roles are assigned to individuals within an Org Area.
On selecting the Roles tab, you will see the Org Structure under Area. You can expand or condense the hierarchy using the > arrows.
You are also presented with the Role Assignment drop-down. Here you can select any of the Roles configured. The primary workflow Roles of Managers and Sponsors, and if configured, Portfolio Manager are there by default. If there are additional Roles configured under the DoA Workflow, and if they have Agent Determination by Area selected, then they will also be available for selection.
Once you have selected which Role Assignment you wish to update you can then select any Stratex User for the Role for any Area from the drop-down. It is possible to select more than one person in each Area, in which case they will all receive the Initiative when it reaches that Role.
Note that if more than one user is assigned to a role, only one of the users will be required to approve.
It is also possible to assign a person to more than one Area.
If nobody is assigned to a Role for a particular Area, then Stratex will reference superior hierarchical nodes until an assignment to the role is determined. For this reason, it is important that there is always someone selected for every Role, even if only at the very highest node on the Org Structure.
Note: Role assignment applies to all subordinate areas in the org structure, so it is not required to assign all roles at every area.
For example, the CEO Role user assignment only needs to be defined at the highest-level node, whereas Cost Centre managers are normally assigned uniquely for every Org Area.
Segment assignment by Organizational Area
Segments, defined under Administration > Configuration > Configuration Data > Segments, allow for the categorization of related areas within an organization based on shared characteristics. This categorization transcends the traditional hierarchical structure, enabling a more holistic view of initiatives. After configuring segments, they can be associated with specific areas in the organizational structure.
Assigning a Segment to an Area:
Navigate: Users can access segment assignment by going to Administration > Configuration > Organizational Structure > Segments.
Select Area and Segment:
The first column displays a list of existing areas within the organization.
The second column provides a dropdown menu containing all pre-defined segments.
Assign Segment: The appropriate segment can be chosen from the dropdown menu for the corresponding area listed in the first column.
Save Changes: Clicking Save confirms the segment assignment.
Update Initiatives (Optional): This option updates existing initiatives to reflect the new segment structure after assignment.
Assigning a segment to every area is optional. Organizations can choose to leave some areas unclassified for flexibility.
Each area can only be associated with a single segment at a time.
Strategy Definition by Organizational Area
Strategy is used to convey the high-level Organizational Strategies and how they cascade down through the Organizational Structure to the different Areas. Individual areas refine the overall enterprise Strategy, and the weighting of strategic objectives may vary within sub-ordinate levels. For example, key strategies of a manufacturing site may relate more to throughput and safety, whereas a sales office may focus more on customer growth and profitability. The Area Strategy can be used to evaluate the Strategic Alignment of an initiative to the benefiting Area.
The Administrator or Manager of an area is able to enter a unique Area Strategy that will be considered when evaluating the Strategic Alignment Dimension of an initiative. If an Area-specific Strategy is not maintained, then Stratex will reference superior hierarchical nodes to infer the Area’s strategic goals. It is therefore important to ensure there is, at least, a top node strategy entered.
The more effort put into evaluating what is important for the Area to achieve in order to meet the broader Organizational goals, the more meaningful and useful the scoring under Strategic Alignment will be in ensuring the best Initiatives are budgeted and approved for the Organization as a whole.
Strategies evolve over time, and with Stratex Online it is possible to prepare future strategic goals whilst the current strategy is still active. Only one Strategy can be active at a time. Strategies are made up of one or more objectives, that are weighted in accordance with Area priorities.
When entering the initial Strategy screen, you will see the following:
Area Name - Used to identify the org area you wish to set up a Strategy for.
View Strategy Button - Opens the department strategy modal which allows you to set up the Strategy for that Area. (See below for further explanation)
Maintained - If there is a tick it means a Strategy has been maintained for that Area.
Expand/Collapse Org area Node - Expand/collapse all child org areas by clicking on the >
Creating & Maintaining a Strategy
By clicking on View, for that Area, you will see any Strategy maintained and have the option to Close or Edit. If you wish to Edit, then click the button.
In doing so, you will be taken to the next drop-down screen.
To Activate a Strategy, click the “Active” icon situated next to the Strategy you wish to have as the current Active strategy.
To Save click the Save button.
You will note, with the Active Toggle, only 1 Strategy can be active at any one time, but this allows you to set up the Strategy for a future year ahead of time and then flick the Toggle when it is to become active. This will make the current Strategy inactive.
To edit a Strategy, click on radio selection. This will render the Objectives for the strategy in the screen.
Under Objective, type in what the Objective is. Best Practice is to keep Objectives simple, measurable, attainable and time-based. e.g. Increase production by 250 units a day to 2,500 units a day. Each Objective should support higher-level Objectives within the organization. e.g. It could be supporting a group Objective to Grow Sales by 12.5% from last year.
You are required to weight the Objectives and the weighting must always total to 100% but it is not necessary for them to be equal. You can make one 5% and another 95% etc. if there are only 2.